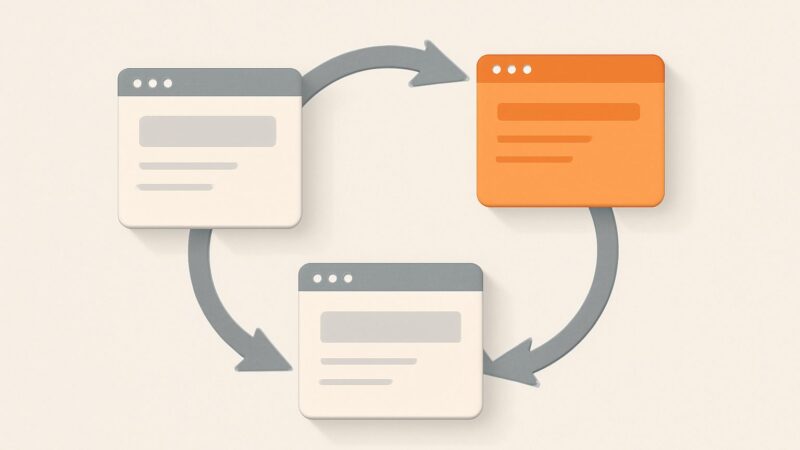

Most people run a technical SEO audit the way you’d run a virus scan: point a tool at the domain, wait for a number, then panic at whatever red bar it spits out. That produces a list of 400 “issues,” 380 of which don’t move rankings, and buries the two or three that actually keep pages out of Google’s index. A real technical audit isn’t a checklist you clear top to bottom — it’s a diagnosis that follows the path a page takes to rank: can Google crawl it, can it render it, and will it index it. Get that sequence right and the priority order sorts itself out.
Crawling vs Rendering vs Indexing: Audit in That Order
These three words get used interchangeably, and conflating them is why so many audits chase the wrong problems. They’re distinct stages, and a failure at an early stage makes everything downstream irrelevant.
- Crawling is Googlebot fetching your URL’s raw HTML. If it can’t reach the URL — blocked in robots.txt, a server error, a redirect loop — nothing else matters.
- Rendering is Google executing the page’s JavaScript to see the final DOM. This happens later, in a separate render queue, and can lag the initial crawl.
- Indexing is Google deciding to store the rendered page and make it eligible to rank. A page can be crawled and rendered perfectly and still not be indexed — because of a
noindextag, a canonical pointing elsewhere, or a quality judgment.
Structure your technical SEO audit around this pipeline. Every finding you surface should answer one question: which stage is it breaking, and does anything valuable depend on that stage? A CLS warning on a page that’s blocked from crawling is noise. Fix the block first.
Step 1: Confirm Crawl Access — robots.txt and Sitemaps
Start where Googlebot starts. Pull /robots.txt and read it line by line. The single most expensive mistake in SEO still ships to production regularly:
User-agent: *
Disallow: /
That one block, left over from a staging environment, tells every crawler to leave the entire site alone. Check that your important sections aren’t disallowed, that you’re not blocking CSS or JS resources Google needs to render the page, and that your XML sitemap is declared with a Sitemap: directive. Then open the sitemap itself: it should list only canonical, indexable, 200-status URLs — not redirects, not noindex pages, not 404s. A sitemap full of junk teaches Google to trust it less. Cross-reference submitted vs indexed counts in Google Search Console (GSC) to see the real gap.
Step 2: noindex vs Disallow — The Distinction That Hides Pages
This is the trap that catches even experienced teams, so be precise. Disallow in robots.txt stops Google from crawling a URL. A noindex meta tag (or X-Robots-Tag HTTP header) tells Google not to index a page it has crawled. They are not interchangeable, and combining them backfires.
If you want a page out of the index, you must let Google crawl it so it can see the noindex. Disallow that same URL in robots.txt and Googlebot never fetches the page, never sees the noindex directive, and the URL can linger in results as a bare link with no snippet. The correct pattern for de-indexing is: allow crawling, serve noindex, and only add a robots.txt disallow later once the page has dropped out. During any technical audit, flag every URL that carries both signals — it’s almost always a bug.
Step 3: Status Codes, Redirect Chains, and Soft 404s
Status codes are the vocabulary Google reads before it reads your content. Audit them at scale:
- 301 vs 302: use a permanent 301 for permanent moves. A 302 signals temporary and can leave the old URL indexed.
- Redirect chains: A → B → C wastes crawl budget and dilutes signals. Collapse them so every redirect points straight to the final destination in one hop.
- Redirect loops: A → B → A returns nothing crawlable. Fatal, and more common than you’d think after a migration.
- Soft 404s: a “not found” page that returns a 200 status. Google flags these in GSC because the code lies about the content. Return a real 404 or 410.
A clean server-side 301 in nginx looks like return 301 https://example.com/new-path; — one hop, permanent, no HTML redirect or JavaScript bounce in the middle. Chains most often appear silently: HTTP→HTTPS plus non-www→www plus a trailing-slash rule can stack into three hops if the rules aren’t ordered to resolve in one.
Step 4: Site Architecture and Crawl Depth
Crawl depth is the number of clicks from your homepage to a given page. It matters because it’s a proxy for how Google weights importance and how reliably it re-crawls the URL. Pages buried five or six clicks deep get crawled rarely and rank poorly, even when the content is strong. A healthy architecture keeps important pages within three clicks of the homepage through logical category structure and internal linking.
Internal links are also how PageRank flows and how Google discovers new URLs. During the audit, look for orphan pages (indexable URLs with zero internal links pointing to them — Google may never find them without a sitemap), over-linked navigation that dilutes equity across hundreds of footer links, and money pages that receive too few internal links relative to their commercial value. A flat, well-linked structure is worth more than any single technical fix.
Step 5: Rendering and the JavaScript Render Queue
If your content or links only appear after JavaScript executes, you’re depending on Google’s rendering stage — and that’s a second, deferred process. Google crawls the raw HTML first, then queues the page for rendering when resources allow. If critical content, internal links, or canonical tags are injected client-side, Google may act on the pre-render HTML for a window before it catches up.
Audit this with GSC’s URL Inspection tool: use “View crawled page” and “Test live URL,” then compare the rendered HTML against your source. If your primary content or navigation is missing from what Google renders, that’s a first-order problem. Server-side rendering or static generation removes the risk entirely by putting the real content in the initial HTML response. Don’t assume “Google runs JavaScript now” means the render is free — it’s queued, it can be delayed, and thin render output is a real indexing risk.
Step 6: Core Web Vitals — The 2026 Thresholds
Core Web Vitals are a real ranking signal, and the metrics changed, so audit against the current set. As of March 2024, INP (Interaction to Next Paint) replaced FID — if your audit still cites First Input Delay, it’s out of date. The “good” thresholds to target at the 75th percentile:
- LCP (Largest Contentful Paint) ≤ 2.5s — how fast the main content loads.
- INP ≤ 200ms — how responsive the page is to user interaction across the whole visit.
- CLS (Cumulative Layout Shift) ≤ 0.1 — how much the layout jumps as it loads.
Audit these from field data (CrUX / the Core Web Vitals report in GSC), not just a single lab run in Lighthouse — lab scores are directional, but Google ranks on real-user field data. INP problems usually trace to heavy JavaScript blocking the main thread; CLS to images and ad slots without reserved dimensions; LCP to render-blocking resources and slow server response.
Step 7: Duplicate Content, Canonicals, and Pagination
Duplication splits ranking signals across URLs that should be one. The usual culprits are URL parameters, session IDs, HTTP/HTTPS or www/non-www variants, and printer-friendly versions. The fix is a self-referencing rel="canonical" on the primary version and a consolidation strategy for the variants. Confirm in GSC that Google is honoring your canonical rather than choosing its own — the “Page indexing” report tells you when “Google chose different canonical than user.”
On pagination, a specific correction: Google deprecated rel="next" and rel="prev" years ago as an indexing signal — don’t recommend them as a current directive. What works now is treating each paginated page as a standalone, indexable URL with a self-referencing canonical, strong internal links between pages, and unique content per page. Don’t canonicalize page 2+ back to page 1 (that hides their content) and don’t noindex paginated pages that hold products or links Google needs to discover.
Step 8: Structured Data and Schema Markup
Structured data doesn’t directly boost rankings, but valid schema unlocks rich results — review stars, FAQ, breadcrumbs, product pricing — that lift click-through from the SERP. Audit that your JSON-LD is present, valid, and matches the visible page content (marking up content the user can’t see is a guidelines violation). A minimal, correct block looks like this:
<script type="application/ld+json">
{
  "@context": "https://schema.org",
  "@type": "Article",
  "headline": "Technical SEO Audit: A Step-by-Step Guide",
  "author": { "@type": "Person", "name": "..." }
}
</script>
Validate with Google’s Rich Results Test, not just a generic schema linter — only the former tells you whether the type is actually eligible for a rich result. Match the schema type to the page: Product for product pages, Article for content, BreadcrumbList for navigation, Organization for the brand.
Step 9: Turn Findings Into a Prioritized Fix List
A raw issue list is useless; a prioritized one is the whole deliverable. Rank every finding by two factors — impact (does it block crawling/indexing of valuable pages, or just annoy a linter?) and reach (one URL or ten thousand?). That produces a natural order:
- Indexing blockers on valuable pages — accidental
noindex, disallowed important sections, redirect loops. Fix today. - Site-wide crawl waste — redirect chains, soft 404s, parameter duplication at scale.
- Architecture and internal linking — orphan pages, deep money pages.
- Performance and enhancements — Core Web Vitals, schema. Real, but rarely the reason a page isn’t ranking.
Running this once is a snapshot; the issues come back after every deploy, migration, or CMS change. This is where SEO Rocket’s real-crawler site audit fits — it crawls the site the way a bot does, surfaces broken links, redirect chains, thin and duplicate pages, missing schema, status-code problems, and Core Web Vitals flags automatically, with the fix explained for each, and re-runs continuously so a regression shows up before it costs you rankings. For the deepest enterprise log-file analysis a dedicated desktop crawler still earns its place; SEO Rocket’s role is the continuous, no-setup layer sitting alongside rank tracking, competitor gap analysis, and AI-visibility tracking on one client dashboard for roughly $50/month with a free tier. The methodology behind it is the same playbook proven across 1,000,000+ ranking pages: fix what blocks indexing first, then compound from there.
Frequently Asked Questions
How often should I run a technical SEO audit?
A full manual audit quarterly is a reasonable baseline for most sites, plus a targeted check after any migration, redesign, or CMS change — those are when indexing blockers get introduced. The more valuable move is continuous monitoring: a crawler that re-checks status codes, redirects, and index directives on a schedule catches a bad deploy in days rather than the months it takes to notice a traffic drop.
What’s the single most common technical SEO mistake?
Accidentally blocking indexing — either a leftover Disallow: / from staging, or a site-wide noindex that survives launch. Both silently remove pages from Google with no error you’d notice in the CMS. That’s why the first step of any technical SEO audit is confirming your important pages are actually crawlable and indexable before touching anything else.
Do Core Web Vitals really affect rankings?
Yes, but they’re a tiebreaker, not a primary driver. Google uses them as part of its page experience signals, so passing helps when content and links are otherwise comparable — but great performance won’t rescue a page that isn’t relevant or isn’t allowed to be indexed. Fix crawling and indexing first; treat Core Web Vitals as the optimization pass after the fundamentals are clean.